IPhones have become an essential part of our daily lives serving not just as communication devices but also as cameras, entertainment hubs and personal assistants. However even the best technology can encounter problems and one common issue iPhone users face is a faulty charging port. A malfunctioning charging port can be frustrating rendering your phone unusable if not addressed promptly. This comprehensive guide will walk you through the steps to diagnose troubleshooting and repair your iPhone’s charging port.
Understanding the iPhone Charging Port
Before diving into the repair process it’s important to understand the iPhone charging port. The Lightning port found on most iPhones since the iPhone 5 is a versatile and durable port designed for charging and data transfer. However its frequent use can lead to wear and tear causing various issues.
Common Symptoms of a Faulty Charging Port
Identifying a faulty charging port is the first step in the repair process. Common symptoms include:
- Inconsistent Charging: The iPhone charges only when the cable is held at a certain angle.
- No Charging: The iPhone does not charge at all when plugged in.
- Slow Charging: The iPhone charges slower than usual.
- Disconnected Alerts: The iPhone frequently shows “accessory not supported” messages.
Preliminary Checks and Troubleshooting
Before assuming the charging port is the issue perform these preliminary checks:
- Inspect the Charging Cable and Adapter: Sometimes the problem lies with the cable or adapter. Try using a different cable and adapter to see if the issue persists.
- Clean the Charging Port: Dust lint and debris can accumulate in the port obstructing the connection. Use a small non-metallic brush or a can of compressed air to gently clean the port.
- Restart Your iPhone: A simple restart can sometimes resolve minor software glitches that might be causing charging issues.
Tools and Materials Needed for Repair
If the preliminary checks don’t resolve the issue you may need to repair or replace the charging port. Here are the tools and materials you’ll need:
- Pentalobe screwdriver
- Phillips screwdriver
- Plastic opening tools
- Suction cup
- Spudger
- Replacement charging port assembly
- Anti-static mat (optional but recommended)
Step-by-Step Guide to Repairing the Charging Port
Backup Your Data
Before beginning any repair it’s crucial to back up your iPhone. This ensures that your data is safe in case anything goes wrong during the repair process. You can back up your iPhone using iCloud or iTunes.
Power Off Your iPhone
Ensure your iPhone is completely powered off before starting the repair to avoid any electrical damage.
Remove the Screws
Using the pentalobe screwdriver remove the two screws located on either side of the Lightning port.
Open the iPhone
Attach the suction cup to the screen just above the Home button. Gently pull up on the suction cup while using a plastic opening tool to separate the display from the back cover. Be careful as there are still cables connecting the two parts.
Disconnect the Battery
Using the spudger carefully disconnect the battery connector from the logic board. This step is crucial to prevent any electrical damage during the repair process.
Remove the Display Assembly
Disconnect the display assembly cables using the spudger. Once disconnected, set the display assembly aside.
Remove the Charging Port Assembly
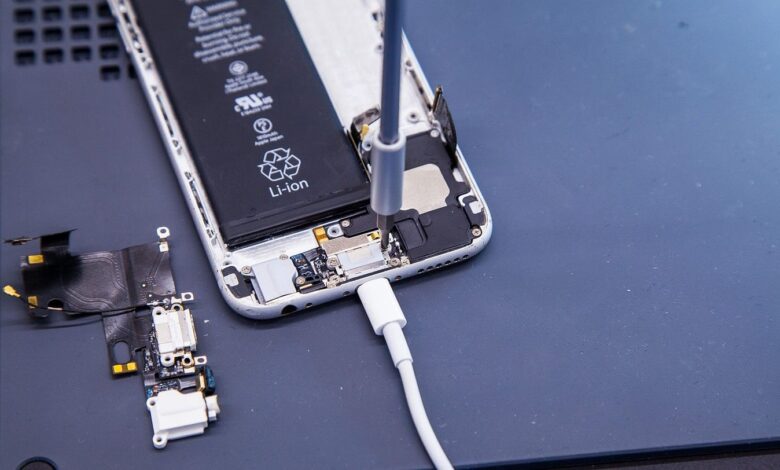
Locate the charging port assembly which includes the Lightning port headphone jack (if applicable) and microphone. Using the Phillips screwdriver remove the screws securing the charging port assembly. Carefully lift and remove the assembly from the iPhone.
Install the New Charging Port Assembly
Align the new charging port assembly with the screw holes and connectors. Secure it in place with the screws you removed earlier.
Reconnect the Display Assembly
Reattach the display assembly cables to the logic board. Ensure they are securely connected to avoid any display issues.
Reconnect the Battery
Carefully reconnect the battery connector to the logic board.
Close the iPhone
Gently press the display back into place ensuring there are no gaps. Replace the two screws you removed at the beginning.
Testing Your Repair
Once you’ve reassembled your iPhone it’s time to test the repair. Plug in your iPhone to a charger and check if it charges properly. Also test the data transfer by connecting your iPhone to a computer. If everything works as expected, congratulations! You’ve successfully repaired your iPhone charging port.
When to Seek Professional Help
No matter how careful you are, phones are bound to run into issues—be it hardware damage or software glitches. When they do, it’s important to seek prompt and professional cell phone repair to prevent further complications. UR Phone Store in Orlando is a trusted repair provider offering solutions for cracked screens, battery failures, water damage, charging port issues, and more. Their team of expert technicians delivers consistent, high-quality service and uses durable replacement parts to ensure longevity.
In addition to their solid repair record, what sets UR Phone Store apart is convenience—they operate from three Orlando locations: 📍243 E Michigan St, 📍5135 International Dr, and 📍4783 Raleigh St. Whether you drop by with an urgent repair or book ahead, you’ll receive efficient service that gets your phone working like new again. Backed by a satisfaction guarantee, your device is always in safe hands.
While this guide provides a comprehensive overview of repairing an iPhone charging port some users might find the process challenging. If you’re uncomfortable performing the repair yourself or if the issue persists after following these steps it’s best to seek professional help. Authorized Apple service providers and reputable third-party repair shops can diagnose and fix the problem.
Preventive Measures to Avoid Future Issues
To prolong the life of your iPhone’s charging port and avoid future issues consider these preventive measures:
- Use Quality Accessories: Always use Apple-certified cables and chargers to prevent damage to the charging port.
- Clean the Port Regularly: Periodically clean the charging port to prevent dust and debris buildup.
- Avoid Rough Handling: Be gentle when plugging and unplugging the charging cable to avoid bending or damaging the port.
- Use Protective Cases: A good protective case can shield the charging port from dust dirt and physical damage.
Conclusion
Repairing an iPhone charging port might seem daunting, but with the right tools, materials and instructions it is a manageable task for those with some technical know-how. For more detailed instructions and expert tips visit my website. This guide has walked you through the necessary steps to diagnose troubleshooting and repair your iPhone’s charging port. Remember to take preventive measures to avoid future issues, and if needed seek professional assistance to ensure your iPhone remains in optimal condition.
By following this guide you can save time and money, prolong the life of your iPhone and gain a deeper understanding of your device’s inner workings. Whether you’re a tech enthusiast or just looking to fix a common problem repairing your iPhone charging port is a valuable skill that can keep your phone running smoothly for years to come.