Walls in our homes naturally take a lot of wear and tear over the years. From scuffs made by moving furniture to nail holes from hanging pictures or small chips caused by daily life, imperfections are bound to appear. While repainting an entire wall may seem like the only solution, it is often unnecessary. A well-done touch-up can restore the smooth and clean look of your walls without the cost or effort of a full paint job. Learning
how to touch up wall paint can save time and money while helping your home look well cared for. With some preparation and the right approach, you can make small repairs blend seamlessly with the rest of the wall.
Preparing for the Touch-Up
Before beginning any touch-up work, it is important to gather the right materials and prepare the wall. The most important item is the paint itself. Ideally, you should use leftover paint from the original job. Paint color and finish can vary slightly between batches, so using the exact paint ensures the best match. If leftover paint is not available, bring a small chip from the wall to your local store for a close match. Along with paint, you will need a small brush or foam applicator, sandpaper, spackle or filler for holes, and a clean cloth. Protecting the floor and surrounding furniture with a drop cloth or plastic sheet is also wise. Proper preparation is what separates a flawless repair from a visible patch.
Cleaning and Repairing the Wall
Touching up paint on a dirty or damaged wall never looks good, so the next step is cleaning and repairing the area. Wipe away dust, fingerprints, or grease marks with a damp cloth and allow the wall to dry completely. For holes, cracks, or chips, use spackle or a lightweight filler to patch the damaged area. Once the filler dries, sand it smooth with fine-grit sandpaper until it is level with the wall. The goal is to create a clean, even surface that will allow the new paint to adhere properly and blend in with the old paint. Skipping this step often results in a lumpy, uneven finish that highlights the repair instead of hiding it.
Matching Paint Color and Finish
Getting the paint color and finish right is the key to making a touch-up invisible. Even if the paint looks the same in the can, differences in sheen such as flat, satin, or semi-gloss can make the repair stand out once dry. Equally important is the texture of the wall. If the wall was painted with a roller originally, using a brush for the touch-up may leave streaks that look different from the surrounding surface. To avoid this, try to use the same tool that was originally used. For small areas, a mini roller often provides a better blend than a brush, especially on textured or larger walls. Remember that the goal is not just to match the color but also the way the light reflects off the wall.
Applying the Paint
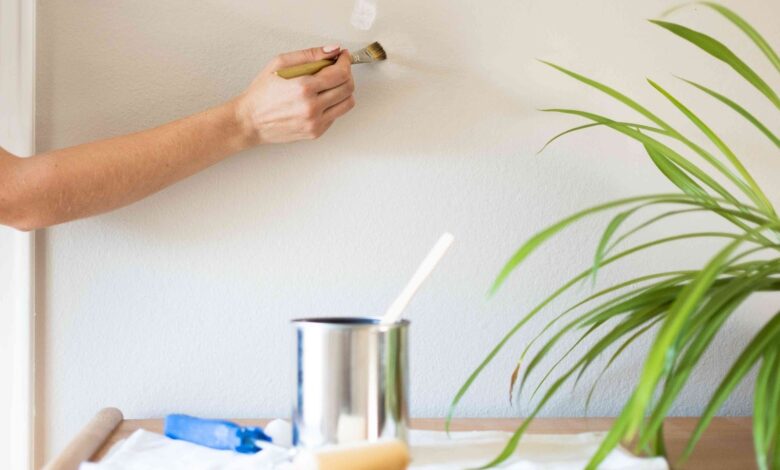
Once the wall is clean, repaired, and dry, it is time to apply the touch-up paint. Dip a small brush or roller lightly into the paint, taking care not to overload it. Start in the center of the damaged area and work outward, feathering the edges so that the new paint overlaps slightly with the old paint. This blending technique helps prevent sharp lines that draw attention to the repair. For best results, apply thin coats and allow each layer to dry fully before deciding if another coat is needed. Two light coats generally look smoother and more natural than one heavy coat. Taking your time during this step ensures the final result looks as close to invisible as possible.
Finishing Touches and Final Check
After the paint dries, examine the repaired spot under different lighting conditions. Daylight, evening light, and artificial lighting can reveal differences in color and sheen that you might not notice otherwise. If the touch-up looks too shiny, lightly sanding the area and applying another thin coat can help. If the color still appears uneven, an additional coat may be necessary. In some cases, if the wall has faded or if there are many spots to fix, repainting the entire wall section may be the only way to achieve a perfect result. Still, in most situations, a careful touch-up will blend in well enough that only you know it is there.
Tips for a Seamless Finish
A few extra tips can make the process easier. Always store leftover paint in a cool, dry place and label it with the room and wall it was used on, so you can find the right match later. Avoid applying paint too thickly, as it tends to dry unevenly. When feathering out the edges, try to spread the paint a little beyond the repair area to create a gradual transition. Patience is also key; rushing through preparation or drying time can ruin the final look.
Conclusion
Knowing how to touch up wall paint is a practical skill every homeowner should have. With the right tools, careful preparation, and attention to detail, you can cover marks, chips, and holes in a way that looks natural. Instead of repainting entire walls, you can refresh your space quickly and efficiently, keeping your home looking well maintained. A little effort now not only improves appearance but also helps extend the life of your walls, ensuring they continue to look their best for years to come.